I wish I could give you measurements on this one, but if you know my style of cooking, you know it's pretty hard to do, it's trial, error, taste...and as for apples, you just can't be sure that one is going to taste like the others.
Before I even cut my apples, I get my largest stainless steel pot going on the oven so I am able to properly can my applesauce.*
So as I am cutting my apples and throwing them into my dutch oven, I put a little lemon juice into the bottom of it to keep the apples from browning, which I realize is unnecessary because its applesauce, but I do that with my apple pie, so it's just what I do. I like my applesauce to taste like apple pie, with a little bit of chunks in it. I buy a bushel of Cortlands and go to town! I have an all-in-one apple peeler, corer, slicer and it makes the job get done so much faster! After they come off that, I cut the already slim loops in half and it makes my cooking time so much faster. I do cut out any huge chunks of peel that may be left behind, but small pieces just add flavor and aren't worth wasting.
When my dutch oven is full, (approx 15-18 good size apples), I start off with 1 cup of sugar and I am going to say 2 tbsp of cinnamon because I really just sprinkle until it looks good. I know you are thinking, where is the nutmeg?? Not in this batch because I didn't have it on hand and it tastes just as good without it. If you are using nutmeg I would go a lot easier then with the cinnamon.
Then I throw it on top of the oven, give it a good stir, put the lid on it and let it cook for about 10 minutes. By now my apples are getting soft so I am able to take a spoon and give some of the mush a taste. This is when I readjust my sugar or cinnamon. When the apples are really soft, I get out my potato masher, throw on a hand-cover pot holder because steam burn is NOT fun and I start smashing. You could use an immersion blender, I have one, it's doing a good job holding its own next to my seal-a-meal in the pantry ;) There are going to be little chunks left behind and that's the best part. I then give it another taste (with a clean spoon, these are not only going to get eaten throughout the winter but passed out to friends and family), and see if it needs any more sugar or cinnamon. Sometimes I need to do another round of mashing, sometimes it's just fine. If you are using my "recipe" you are going to end up tasting it about 4 times, the total cook time is about 22-25 minutes. When it looks and tastes like a nice, mildly chunky, apple-pie tasting applesauce: you know you are ready to fill your jars and get them ready to last the winter. This part I like to have a partner with because filling the jars and then wiping off the tops so there isn't going to be anything sticky around the lid takes a while. If my sister is around, she is the jar top wiper, otherwise it's my significant other. (if you make a mess on the lid, clean it, if it dribbles down the jar, don't fuss about it, that will just wash away in your canning water). I usually do two batches in a day because by then I'm exhausted and that yields about 14, 8 oz canning jars. I use the 8 oz jars only because I make homemade jelly and those are the size that are left over. Although this round, as you can see, I ran out of the 8 oz and used some 16 oz jars that I had left over from homemade spaghetti sauce.
Now get to your local orchard (or grocery store if you don't have 10 of them within a 20 minute drive like I do) and get to making some applesauce!
*I can using the boiling method. I take a stainless steel pot, fill it with enough water to cover the tops of my jars by about an inch and get it boiling. I let my jars boil in there for 10 minutes. 5 minutes will do, but I have always done 10. There are recommendations on the internet on how long you should boil based off what you are canning, but this topic is about applesauce. Presto! You have canned applesauce that you can snack on all throughout the winter with plenty to pass out to your friends and neighbors.
Friday, October 9, 2015
Thursday, February 26, 2015
Healthy Strawberry Smoothie
Okay, So I admit, I cheated and took a sip before this picture (and it was Oh...sooo Yum!)
3 ingredient strawberry smoothie.
1 C. Organic Frozen Strawberries, this time of year its hard to find fresh strawberries, but frozen works best because they act as the ice!
1- 1 1/2 Strawberry Yogurt (we use Stonyfield Organic)
2 C. No-Fat Milk (we use Garelick Farms here, no GMO's, local) (or soy, you could do almond, whatever you drink works, you may need to play around with the milk portions).
chia seeds, just throw in the amount you want...they will sink in your glass fyi
AND BLEND!
That's it! We do this with peaches and raspberries as well. You could use plain yogurt if you wanted. We DON'T use greek yogurt for 2 reasons. 1. It's gross and 2. Have you researched Greek Yogurt and the problems they are having with the whey disposal? If not, google or go here: GREEK CLICK ME, and then STOP GOING GREEK!
Wednesday, January 21, 2015
Mini Muffins: The Perfect School Day Breakfast
My daughter loves mini muffins, if I can find or create the flavor, she eats it
. They sell them in the stores, over priced and full of preservatives. While I don't yet have a food sealer, freezer bags work great in the mean time.
Depending on how I am feeling (today I cheated and used Jiffy Blueberry Muffin mix), I make mini muffins, bag them in 6 and freeze them. Pull a bag out the night before and you're good to go for the morning!
You can find mini muffin tins and cups anywhere. I make 48 at a time so I do go through a LOT of cups, but it's completely worth it because I know exactly what is in the muffins and I know it's good for my daughter. They keep in the freezer for 3-6 months but in our house, they usually don't last that long. I used my phone camera which doesn't have a flash, so the pic isn't the best, you get the idea.
Happy Eats!
. They sell them in the stores, over priced and full of preservatives. While I don't yet have a food sealer, freezer bags work great in the mean time.
Depending on how I am feeling (today I cheated and used Jiffy Blueberry Muffin mix), I make mini muffins, bag them in 6 and freeze them. Pull a bag out the night before and you're good to go for the morning!
You can find mini muffin tins and cups anywhere. I make 48 at a time so I do go through a LOT of cups, but it's completely worth it because I know exactly what is in the muffins and I know it's good for my daughter. They keep in the freezer for 3-6 months but in our house, they usually don't last that long. I used my phone camera which doesn't have a flash, so the pic isn't the best, you get the idea.
Happy Eats!
Wednesday, January 14, 2015
Apple Cider Vinegar
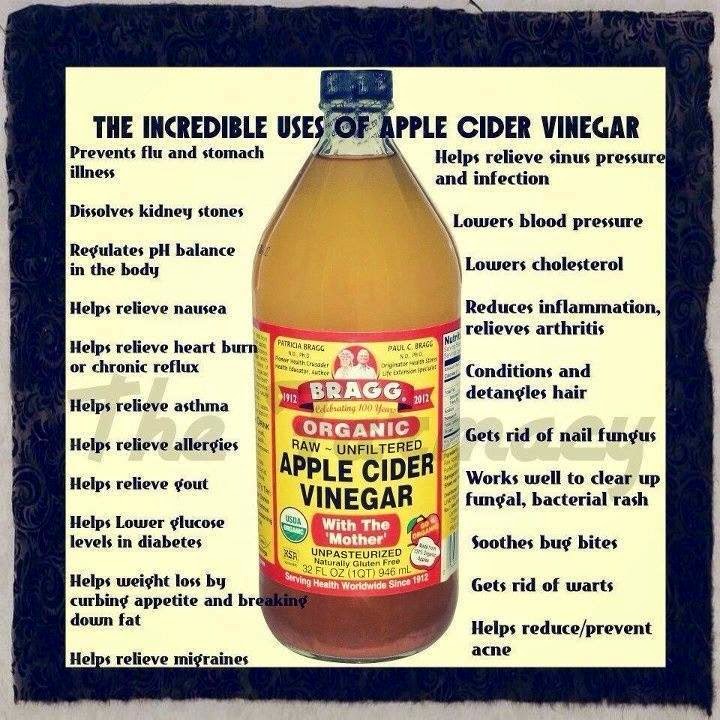
While I watch the cactus role by on this blog, I still realize I have a great love for it because I built it from scratch. So today, I'm finally getting around to working on it. This isn't my recipe, its simply a pic of something a lot of us have known and worked with for years. Psst: You can click on the picture to make it bigger.
To your health!
To your health!
Friday, January 31, 2014
Feeling Sick?
I don't have a picture because thankfully no one is sick! Having asthma, when we get sick, we have to limit what we can take as far as medication. I'm not a doctor, I just know what works for us, and hopefully you can find some help here.
Now I am not a tea drinker, hot or cold, but when we're sick, its a must. For us grown ups, some hot green tea with a bit of lemon and honey clears out your lungs. (I add a packet of my favorite sweetener because like I said, I'm not a fan of tea). The good news is most teas are caffeine free, so it's great for kids (double check just in case!). My daughters favorite is Raspberry Zinger. Celestial Seasonings makes great variety packs to try and see which ones your kids might favor most.
Honey has great healing properties as seen here:
http://www.naturalnews.com/039963_cinnamon_honey_healing.html
This site talks about cinnamon too, because that is included in my next home remedy.
Sore throats (and Coughing.)
We all get them, and why waste money on a store remedy (although Ludens are oh so yummy). Again, I don't measure so the best way to make sure you have it right, is to taste it. We make a small dose that will last 3x a day for 3 days.
3tbs honey
4 tbs white vinegar
a healthy sprinkle of cinnamon
stir together (taste to make sure its good, the consistency should be mildly runny)
As seen in the link above, the honey and cinnamon are great for healing and the combo soothes your throat and helps ease your coughing.
Stuffed Sinuses
There is always the tried and true netty pots. But when my nose gets crazy stuffed, I self drown. So I boil Apple Cider Vinegar and breathe it in. Another tried and true remedy handed down from our grandmothers is boiling water, putting it in a plugged sink and hovering over it with a towel. It clears up your sinuses and lungs.
Coughing keeping you up?
I throw a hefty pillow under my daughters mattress. It elevates the mattress (not just her head), so it makes it easier for her to sleep comfier and being propped up helps her with her night time coughing.
Stay Hydrated!!
Water, tea, ginger ale, anything! Just make sure you are drinking. I lost a friend to dehydration while sick, and maybe that's why this part of staying healthy is so important to me. The more hydrated you are, the more prepared your body is to fight off infection.
We always make sure to have air purifiers going, cleaning them once a week, and replacing the filters as needed. We run humidifiers (especially with it being winter). I don't add anything to the water I put in it, but I imagine a few drops of lavender oil would help aid in sleeping, as lavender is a tried and true sleep aid.
Got any ideas we should try? Send them along
Now I am not a tea drinker, hot or cold, but when we're sick, its a must. For us grown ups, some hot green tea with a bit of lemon and honey clears out your lungs. (I add a packet of my favorite sweetener because like I said, I'm not a fan of tea). The good news is most teas are caffeine free, so it's great for kids (double check just in case!). My daughters favorite is Raspberry Zinger. Celestial Seasonings makes great variety packs to try and see which ones your kids might favor most.
Honey has great healing properties as seen here:
http://www.naturalnews.com/039963_cinnamon_honey_healing.html
This site talks about cinnamon too, because that is included in my next home remedy.
Sore throats (and Coughing.)
We all get them, and why waste money on a store remedy (although Ludens are oh so yummy). Again, I don't measure so the best way to make sure you have it right, is to taste it. We make a small dose that will last 3x a day for 3 days.
3tbs honey
4 tbs white vinegar
a healthy sprinkle of cinnamon
stir together (taste to make sure its good, the consistency should be mildly runny)
As seen in the link above, the honey and cinnamon are great for healing and the combo soothes your throat and helps ease your coughing.
Stuffed Sinuses
There is always the tried and true netty pots. But when my nose gets crazy stuffed, I self drown. So I boil Apple Cider Vinegar and breathe it in. Another tried and true remedy handed down from our grandmothers is boiling water, putting it in a plugged sink and hovering over it with a towel. It clears up your sinuses and lungs.
Coughing keeping you up?
I throw a hefty pillow under my daughters mattress. It elevates the mattress (not just her head), so it makes it easier for her to sleep comfier and being propped up helps her with her night time coughing.
Stay Hydrated!!
Water, tea, ginger ale, anything! Just make sure you are drinking. I lost a friend to dehydration while sick, and maybe that's why this part of staying healthy is so important to me. The more hydrated you are, the more prepared your body is to fight off infection.
We always make sure to have air purifiers going, cleaning them once a week, and replacing the filters as needed. We run humidifiers (especially with it being winter). I don't add anything to the water I put in it, but I imagine a few drops of lavender oil would help aid in sleeping, as lavender is a tried and true sleep aid.
Got any ideas we should try? Send them along
Thursday, January 30, 2014
Food Dehydrating
So last month I bought a food dehydrator from Amazon here:
http://www.amazon.com/Nesco-FD-37A-American-Dehydrator-400-watt/dp/B00CS5ZI6G
Since then I have been dehydrating up a storm. I didn't buy the extenders because we are a house of 2, and didn't think I needed the extra space...yet. I haven't done meat, I am not a huge meat fan, and I have yet to dip into the fruit roll up aspects of the dehydrator, but I've been doing fruits. Banana's (as seen above), strawberries and apples (so far). To me, my electric bill hasn't shot up from the use, it's much cheaper then buying it in the store, I know exactly what is going into my food and the fruits go great in our home made granola (see previous post) or just for healthy snacking. The dehydrator comes with instructions, drying times etc. There are some recipes and tips out there on the web too.
So how do I prepare my fruit?
I take a gallon zip lock bag and put it in my 4 cup measuring cup, this holds the bag easier, clearly you can come up with your own way.
I melt 1 packet of my favorite sweetner (splenda) in a tbsp of warm water and then add that with
1/4 cup of cool water, 1/4 cup honey to the bag and stir! I drop the fruits into my bag as I am chopping and then shake them all up when I'm done and place them on my racks. When I did apples, I added a squirt of lemon juice (to stop browning) and approx. 1tsp of cinnamon to give it the apple pie flavor in my marinade. (SOO YUMMY!) I usually coat my racks with vegetable oil to avoid over stickiness but if I am feeling lazy I just use a butter spray. Both works fine. Dehydrate according to the times in your book or online.
Some tips I enjoy:
-You don't have to marinate the bananas like the ones above. I was going for a "caramelized" aspect and think I got it. The first time we did bananas there was no marinade, they came out good, but needed a little something extra. I think I got it this time ;)
-I shut the machine off every 2 hours for about 10 minutes just to let the process kickstart again.
-You don't have to rotate the trays, but I do, especially because of the marinade.
-If its looking done, try one! Your mouth knows best.
Enjoy :)
Homemade Granola
Granola is a great treat! It's healthy, its a great source of energy, and its much cheaper when you make it yourself.
If you know me, you know I don't measure. So I'm going to give some rough estimations, and you can always google similar recipes and add or subtract ingredients according to your tastes.
300 degree oven
3-4 cups of oats
1/4 cups of almonds, pecans and walnuts each
1/4-1/2 cup raisins
tsp of cinnamon
1/4-1/2 cup brown sugar
1/4-1/2 cup of any dried fruits. Strawberries, bananas, apples (I dry my own fruits, I have a simple recipe I'm adding after this post).
1/4 honey1/4 vegetable oil
tsp of vanilla
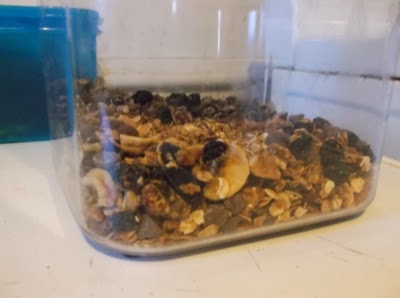
Mix together, spread out evenly on a cookie sheet. Throw it in the oven and check and stir it approx. every 10 minutes. Cook for 30-40 minutes or until golden brown, don't over cook it because you are going to let it cool in the sheet and it will continue to crisp there. When it is cool, put it in a air tight container. I stir in some chocolate chips at this process for a little treat. You can also choose to add your dried fruits at this stage if you want. It comes out great adding it before or after.
Enjoy!
Subscribe to:
Posts (Atom)